How do I winterize my Seakeeper?

When the winter chill starts creeping in, the all-too-familiar sadness of the end of boating season follows closely behind. Preparing your boat and all its equipment for winter can take time, but it’s important, and luckily, winterizing your Seakeeper is simple!
WHEN TO WINTERIZE
Your Seakeeper needs to be prepared for winter if any of its components or its sub-systems will be exposed to freezing temperatures during winter storage.
WHAT’S NEEDED
Winterizing your Seakeeper only requires five simple items. Make sure to gather all these items before you begin.
- Straight slot screwdriver
- Funnel
- (2) 5-gallon buckets
- Marine winterization antifreeze
HOW TO WINTERIZE
First thing’s first – close the seawater intake seacock that supplies the cooling system. Next, you want to prepare the seawater strainer. Open the seawater strainer and remove the screen. Clean the screen and strainer housing of any debris. Remove any water that’s in the strainer housing before reinstalling the screen.
Now, does the seawater strainer installation allow for pouring antifreeze into it?
YES – Great! This is going to be easy!
- Simply pour antifreeze into the strainer body.
NO – No worries, there are just a few more steps involved.
- Close the seawater strainer.
- Remove the hose clamps attaching the seawater pump suction hose to the seacock, allowing you to remove the hose and place it into one of the buckets, catching any water that may drain out. Dump any water out of the bucket.
- Remove the hose clamps attaching the discharge hose from the Seakeeper heat exchanger to the overboard drain thru-hull, allowing you to remove the hose from the thru-hull and place it in the other 5-gallon bucket.
- Now it’s time to add the antifreeze! With the seawater intake hose (the first one you disconnected) still in the bucket, fill the bucket with antifreeze. The amount required will depend on your hose length, Seakeeper model, etc., but ensure the hose end stays submerged in antifreeze. If hose length or accessibility is an issue with the bucket, swap it out and use the funnel. Just place the funnel at the end of the intake hose and pour antifreeze directly into it.
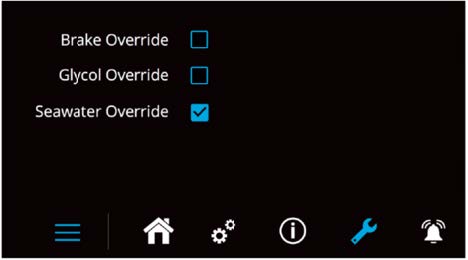
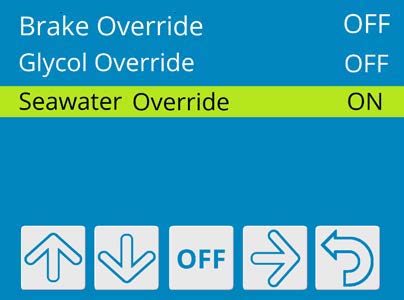
On your Seakeeper display, tap the wrench icon to open the Settings Page, then press and hold the wrench icon for three seconds to open the override screen. If you are using a Seakeeper 3.5″ display, enter code 4442 when prompted and push the right arrow key until you see the screen with overrides. Activate Seawater Override and allow the pump to draw antifreeze from the bucket, funnel, or strainer. Add antifreeze as it’s needed to ensure the hose end stays submerged in antifreeze and no air is drawn into the seawater pump. Continue to purge antifreeze through the system until you see clean, undiluted antifreeze coming from the discharge hose. Then, deactivate the seawater override setting on your display screen by tapping the checkbox again.
If you just used the strainer body to add antifreeze, then simply close the strainer. If you removed the suction hose to add antifreeze, then reattach the intake hose to the seacock and tighten the hose clamps. Finally, reattach the discharge hose to your overboard drain and tighten the hose clamps.
Make sure the seacock remains closed until winter is over and your Seakeeper is returned to service. When you’re ready to hit the water again, simply open the seacock valve!
That’s it!
TIPS AND TRICKS
- Not all antifreeze is created equal. There’s ethylene glycol or propylene glycol-based antifreeze. Ethylene glycol is poisonous to wildlife, so we recommend choosing a propylene glycol-based antifreeze.
- It’s also important to check for freeze rating. Be sure to choose an antifreeze with a freeze rating low enough to protect your system at the coldest temperatures your boat may experience in storage.
- Try to keep buckets near the center of the boat to minimize the chance of overboard spills. Save yourself some cleanup and save the environment!
Taking the time to properly winterize your Seakeeper and boat means you’re less likely to encounter damage in the spring and you’ll be ready for stable fun as soon as your hull hits the water!
NEED HELP WITH WINTERIZING YOUR SEAKEEPER?
Search our Dealer map to find your local Seakeeper technician.
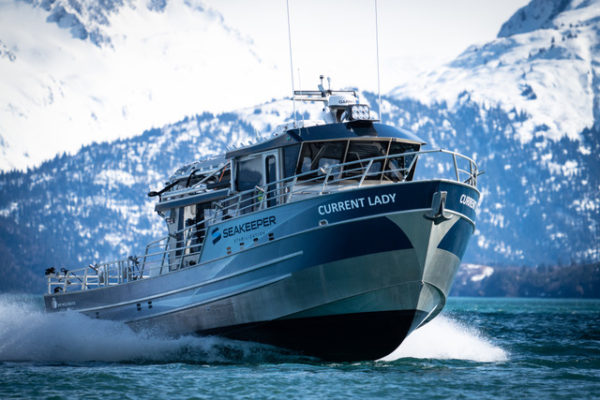
Choose Your Charter
Now that Seakeeper is on thousands of boats around the world, you’ve got the power to choose a Seakeeper-equipped charter boat on your next outing.
Seakeeper for Divers
Whether you’re a dive operator interested in improving the experience for your customers, or you dive from your personal vessel, Seakeeper can drastically improve your boating experience so you can get back to doing what you love.
Seakeeper Sizing and Performance
It’s easy to watch videos and see the difference between a boat’s side-to-side roll when the Seakeeper is unlocked and locked. But is that real?